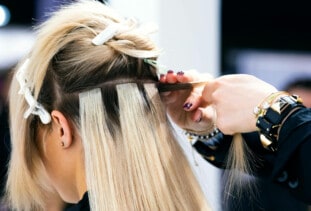
Sew-ins are a great way to add length, volume, or thickness to your hair if you’ve had trouble blending hair extensions. While hair extensions add volume and length, sew-ins are woven into or installed over cornrowed hair, and will be the entirety of the visible hair in many cases. However, it’s still possible to get a partial sew-in and blend it with your natural hair.
Once you’ve made your appointment, you might be wondering how to wash your new look. It’s very important to take care of your sew-in to make it last longer and look its best. We’ll walk you through step-by-step how to wash a sew-in correctly so you can get the most out of your style.
1. Shampoo and massage scalp
Use a nozzle or applicator bottle to get products into the braids under your sew-in or net weave easier.
The first step to care for your sew-in is to make sure it’s clean and untangled.
- If it’s slightly tangled, you can gently detangle with a brush before you begin shampooing.
- If your weave is very tangled, you might want to detangle it in the shower with your fingers and conditioner before you shampoo it.
Your sew-in needs to be thoroughly washed to remove any product buildup. You can use your regular shampoo for this. When washing your sew-in, it’s very important to reach your braids. Your scalp will continue to produce oil under your weave, so you still need to make sure it’s properly cleansed to protect your natural hair and scalp.
Stylists recommend using tools like scalp scrubbers and applicator bottles to ensure that you’re properly cleansing your scalp each time you shampoo your sew-in. Make sure you target your hairline and the nape of your neck when you’re shampooing your hair.
Sometimes diluting your shampoo while you’re washing makes penetrating your braids easier, especially if you’re wearing a weave with a net. You’ll also have to spend more time rinsing out your sew-in than you do with your natural hair. To avoid irritation, it’s important to get all the shampoo out of your hair before conditioning.
2. Condition and untangle
Sew-ins can be damaging if you don’t properly care for your braids underneath. Conditioning your natural hair is a key part of keeping it healthy. To give your conditioner a boost, wear a shower cap after you’ve applied it and keep it on for the rest of your shower. Then remove it and rinse as the last step in your shower routine.
While your hair is saturated with conditioner, take the opportunity to detangle it before you rinse. The moisture from the conditioner makes detangling easier without tugging on your weave or the braids underneath it.
When it’s time to rinse, make sure you rinse all the conditioner out. When you normally condition your natural hair, you may leave a bit of conditioner in. For sew-ins, this can create more product buildup, so you’ll want to rinse it well.
3. Dry your weave
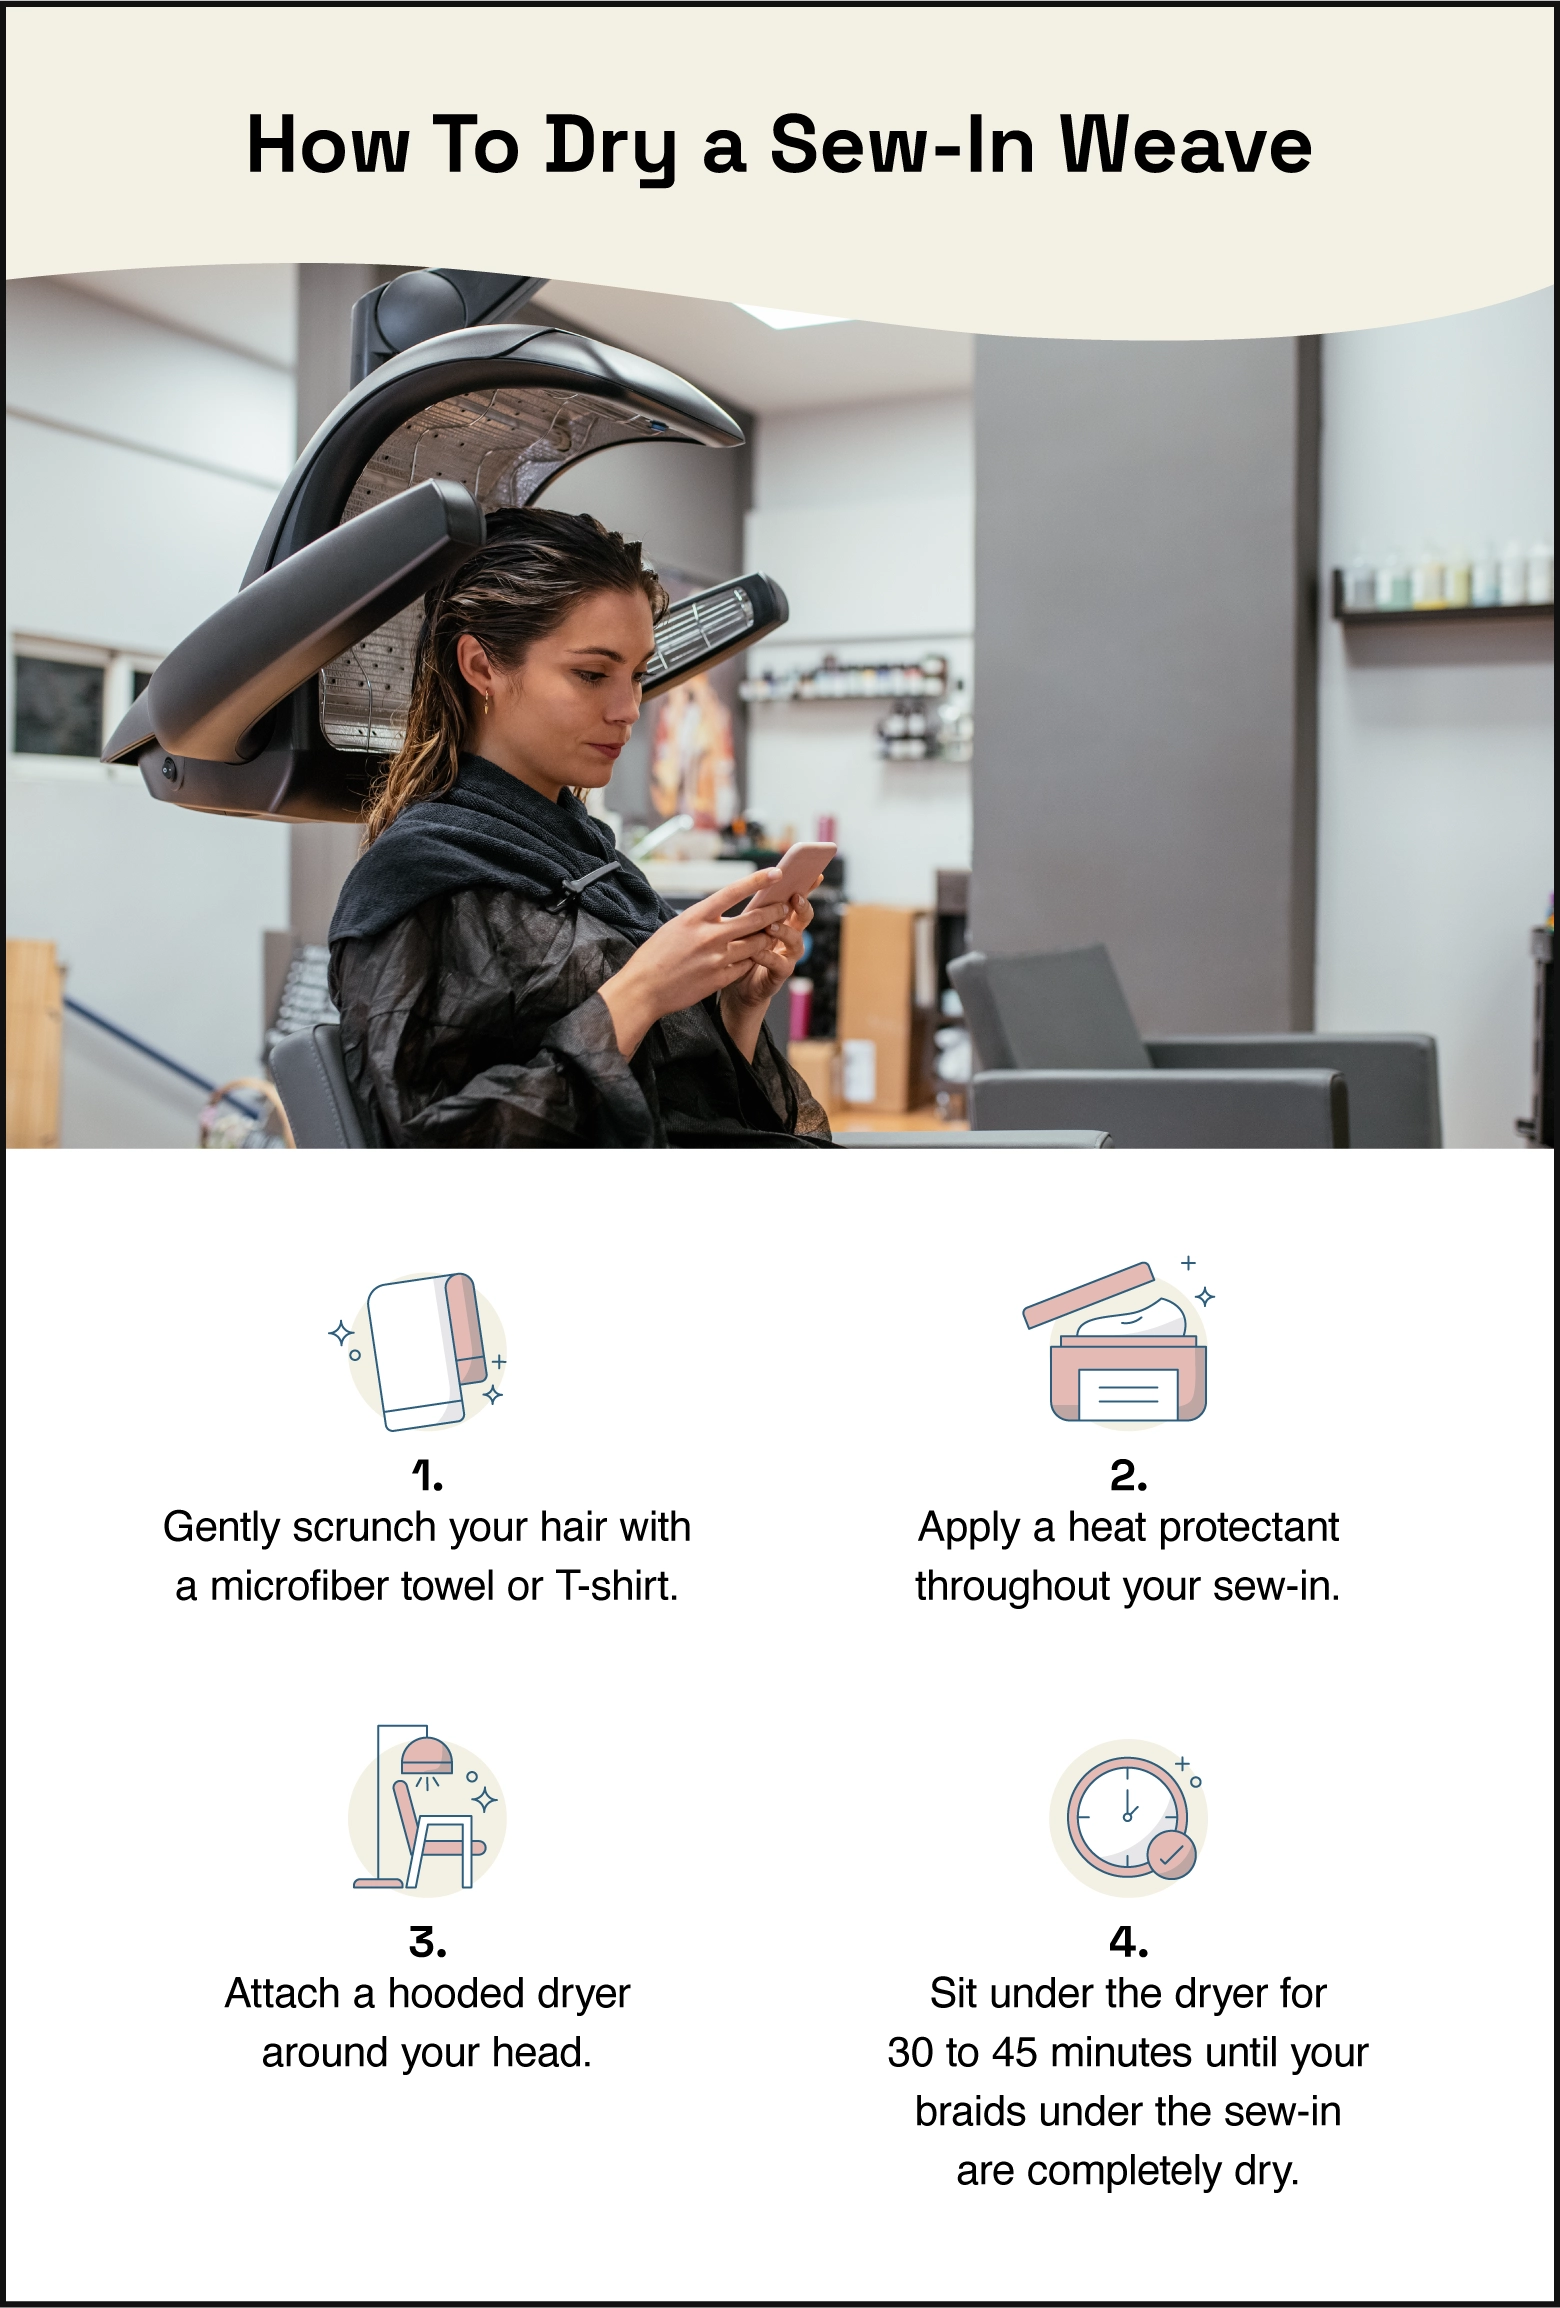
Drying your weave is one of the most important steps in taking care of it. Unlike your natural hair, which might look great after you let it air dry, you must blow dry your weave. This is because your natural hair underneath is tightly braided and then covered by the weave. It won’t be able to dry completely without your help.
If you let your hair stay damp for too long, it can cause a mildewy weave and even scalp irritation. To properly dry your sew-in:
- Gently scrunch your hair with a microfiber towel or T-shirt.
- Apply a heat protectant throughout your sew-in.
- Attach a hooded dryer around your head.
- Sit under the dryer for 30 to 45 minutes until your braids under the sew-in are completely dry.
Hooded dryers or hood attachments for blow-dryers are recommended for drying sew-ins because they concentrate the warm air on your roots, ensuring that your natural hair dries properly. If you don’t have a hooded dryer, you can use a diffuser, though you’ll have to be careful about drying your braids completely without burning your scalp.
4. Moisturize the scalp
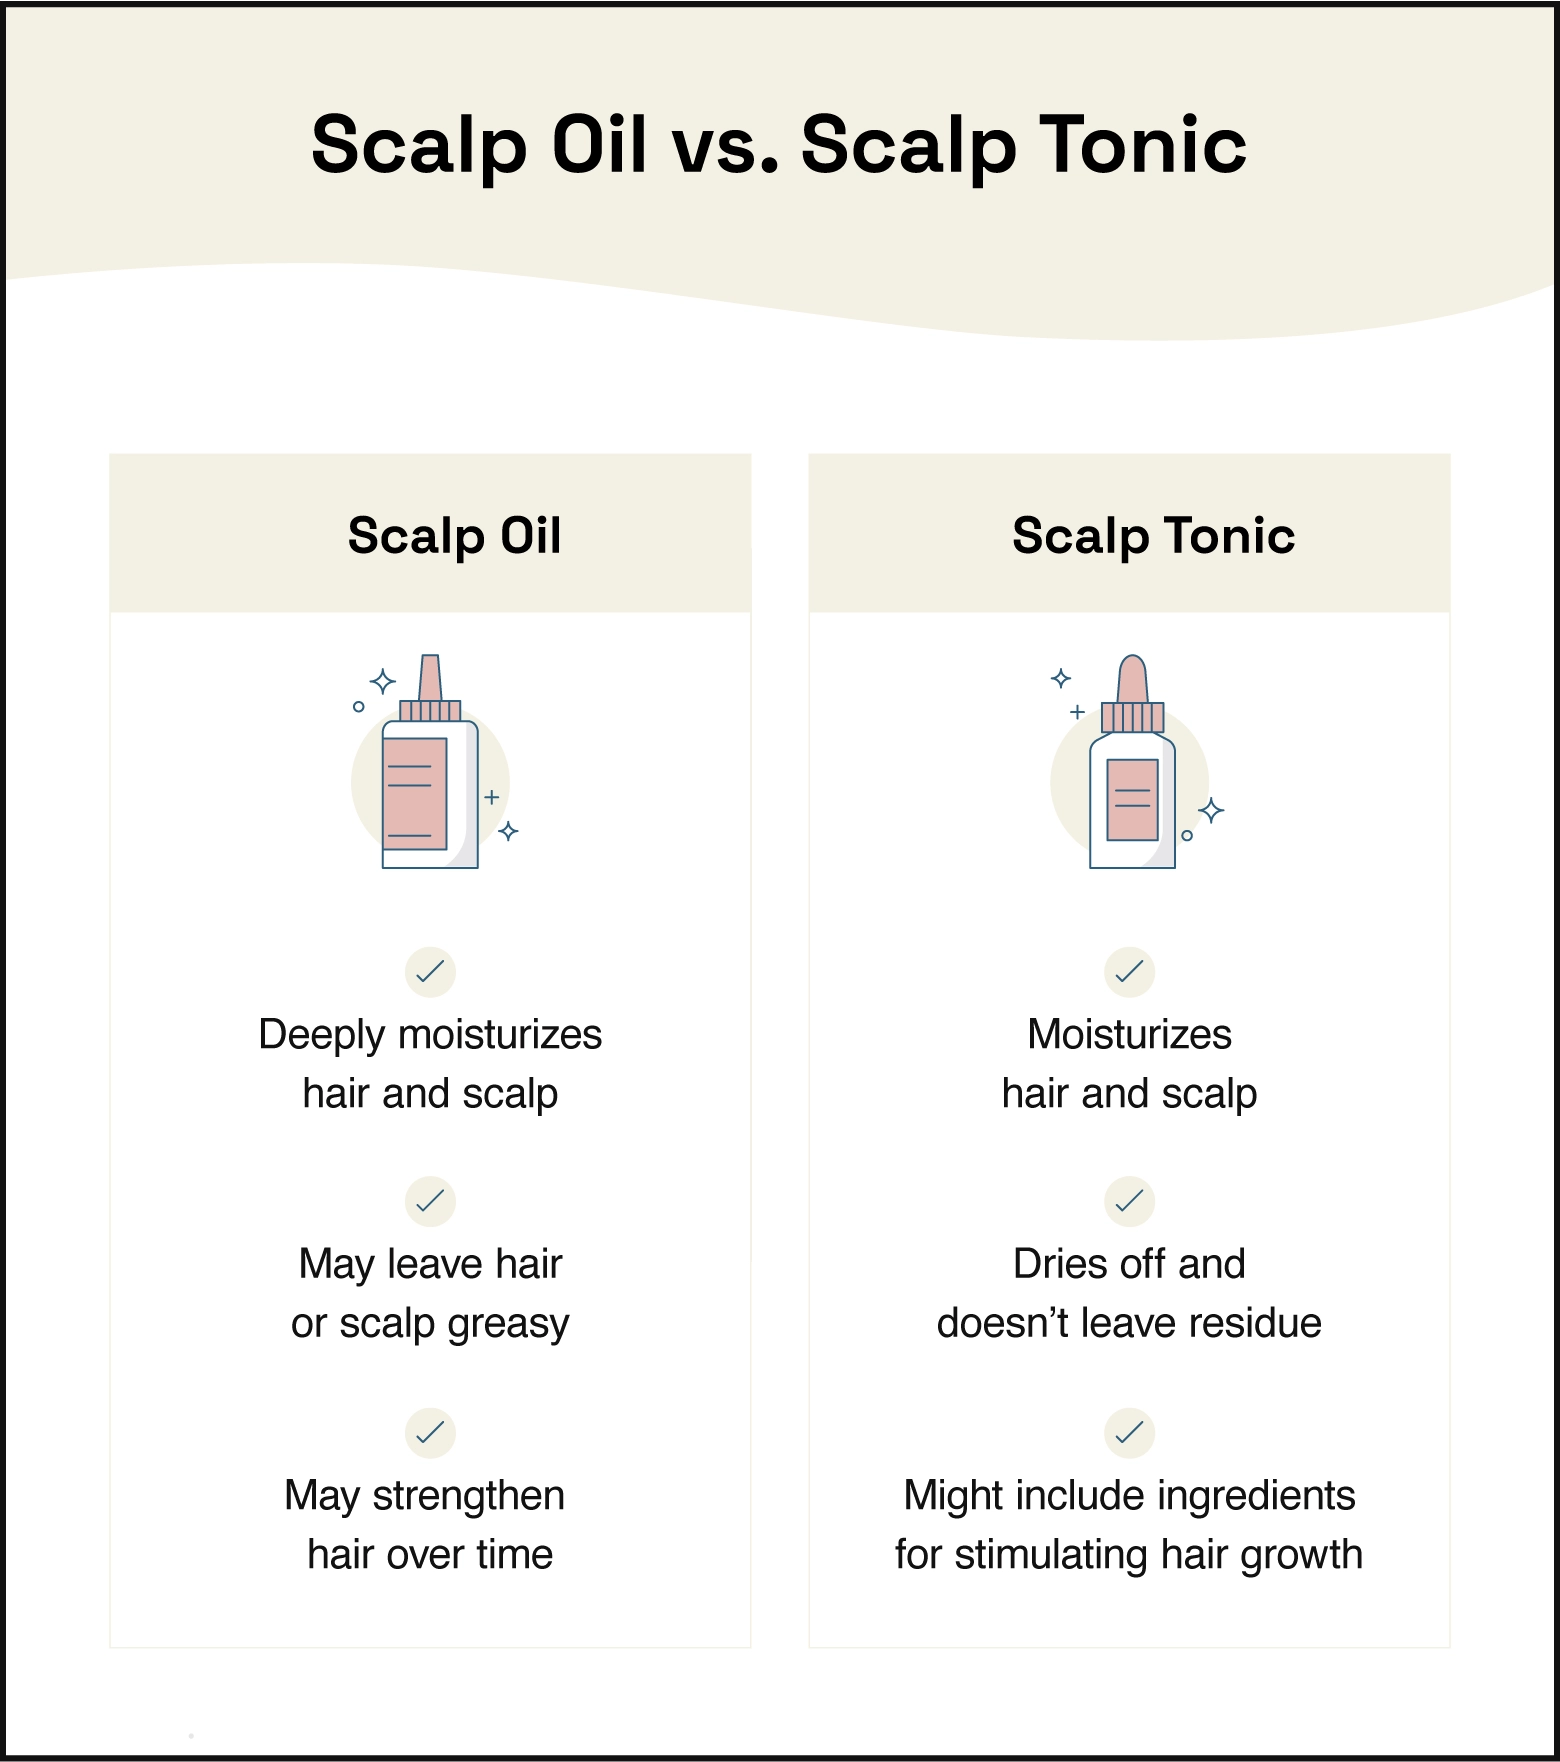
After you’ve dried your sew-in and braids, it’s time to give your scalp some TLC. A moisturized scalp is a happy scalp, and some people find that sew-ins can dry out their scalp and cause flaking. To combat this, use a nozzle bottle of scalp tonic or oil to help moisturize your scalp without making your sew-ins look greasy or oily.
Section off your hair and go bit by bit, massaging the product into your scalp as you go. If you’re new to sew-ins, pick up both a scalp tonic and oil to try. It’s hard to know which will work better for you without some experience with sew-ins, so experiment with both to see which gives you better results.
Scalp oil:
- Deeply moisturizes hair and scalp
- May leave hair or scalp greasy
- May strengthen hair over time
Scalp tonic:
- Moisturizes hair and scalp
- Dries off and doesn’t leave residue
- Might include ingredients for stimulating hair growth
6. Style your sew-in
The final step of your wash routine is to style your sew-in. You can style your sew-in as you would style natural hair. Whenever you’re using a brush or comb, like if you’re giving yourself a blowout, be extra gentle so you’re not tugging on your braids under your weave.
Just like natural hair, you can damage sew-ins with heat, so make sure you’re using a heat protectant any time you use hot tools on your weave. This will ensure that your strands stay sleek and frizz-free until it’s time to remove them.
7. Repeat wash routine weekly
You should wash your sew-in approximately as often as you wash your natural hair. At maximum, you can wait two weeks between washes, but not everyone’s scalp can tolerate infrequent washing, so it may create dandruff.
If you exercise often or have an oily scalp, you’ll need to wash your sew-in more often. If your weave has product buildup, your roots feel oily, or your scalp feels itchy, that’s a good sign that it’s time to schedule a wash day.
8. Uninstall after 6 to 8 weeks
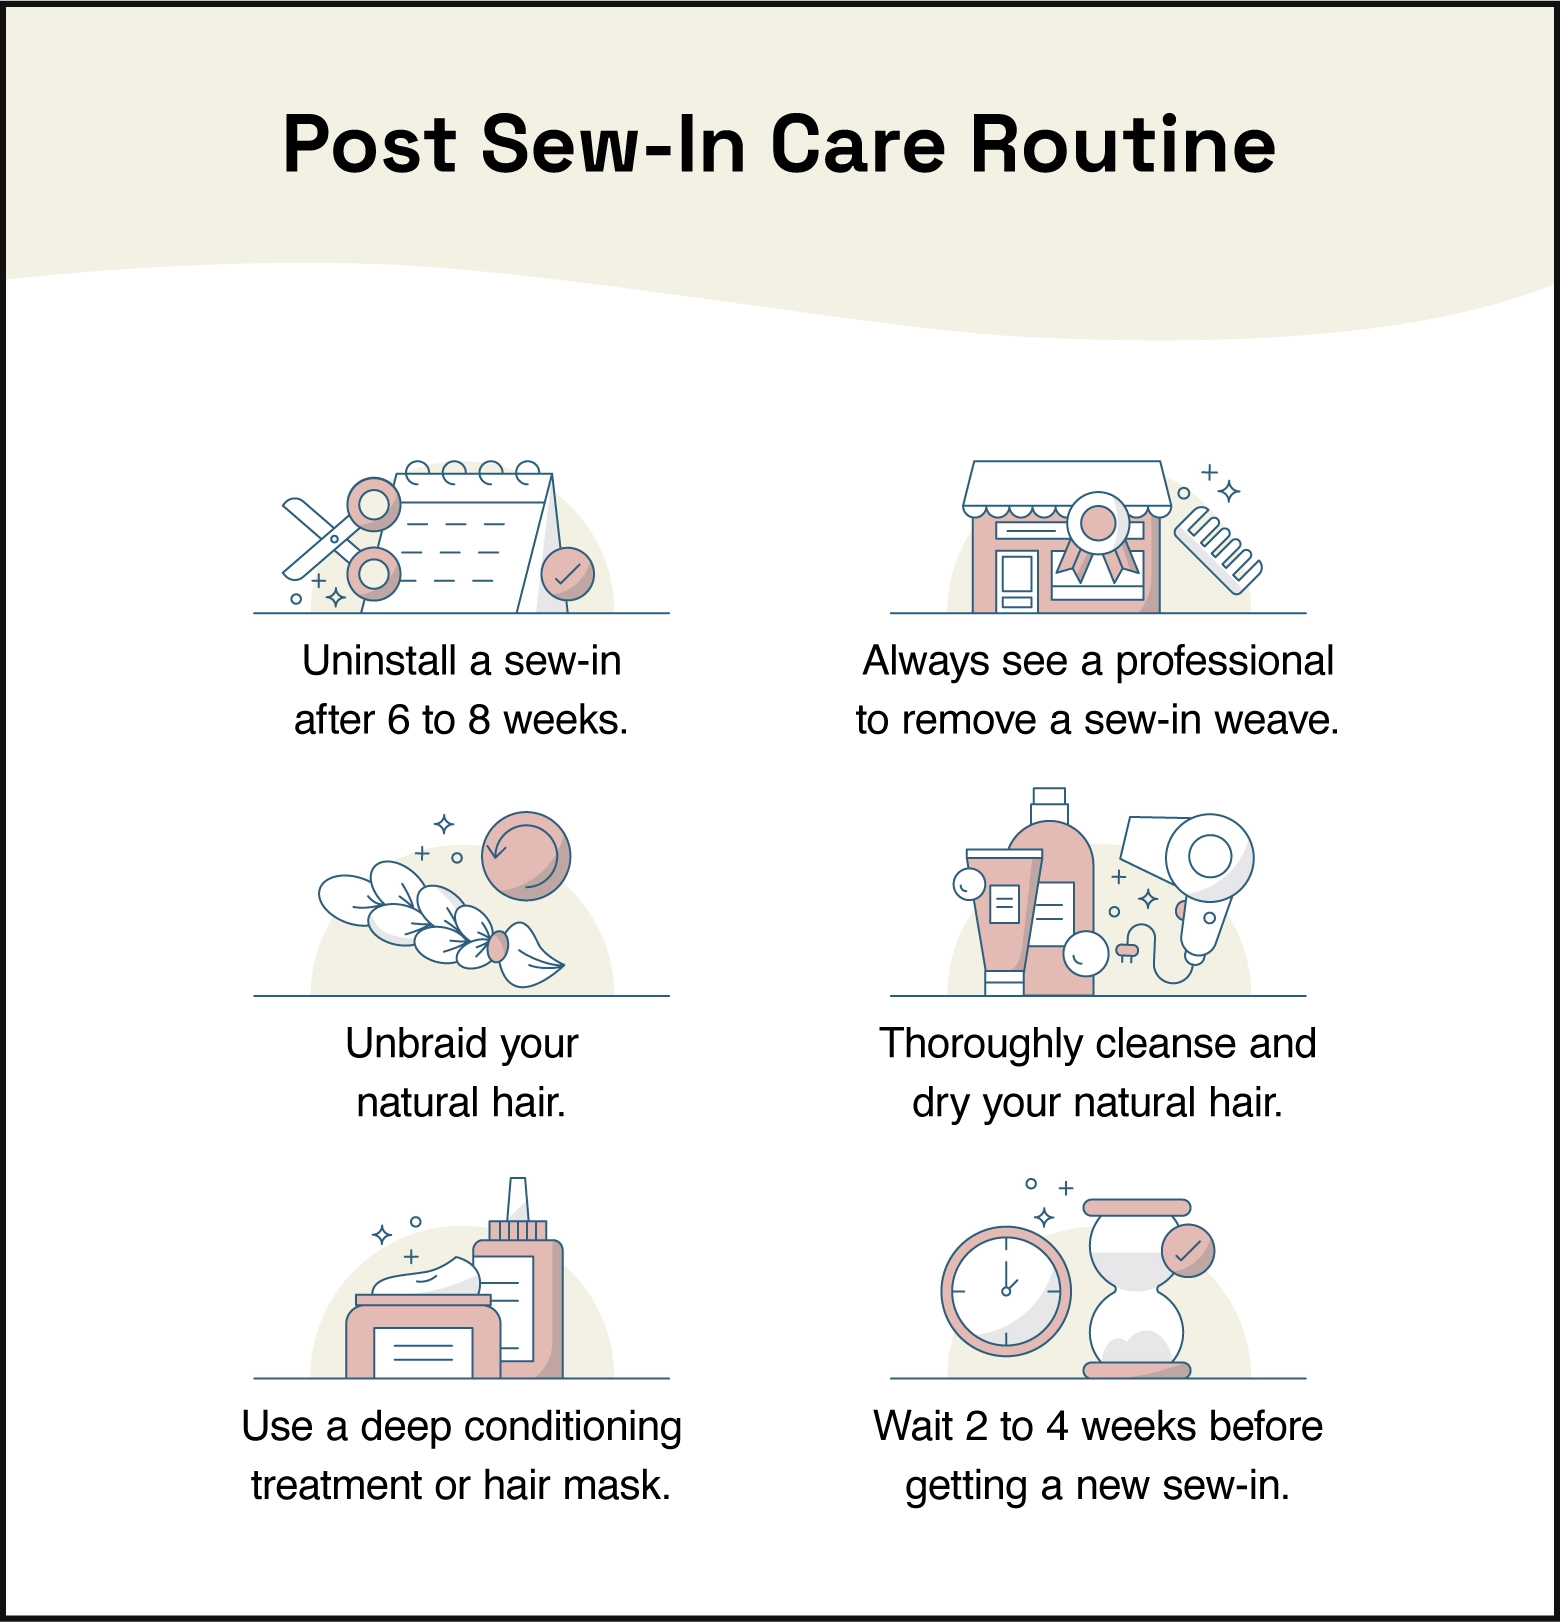
Though sew-ins can last a while, they don’t last forever. After six to eight weeks, it’s time to say goodbye to your weave. After this time, your sew-in will loosen as your natural hair grows and your weave might start looking dull. It can be tempting to reinstall a new one right away, but try giving your scalp and natural hair a break.
You should always book a professional to uninstall your weave. It’s nearly impossible to do yourself, as it takes a lot of experience and skill to remove a weave without damaging your natural hair.
After your stylist has removed your weave, give your natural hair a deep cleanse and use a deep conditioning mask. To reduce damage and the risk of issues like traction alopecia, give your hair a break for two to four weeks before getting another sew-in installed. In the meantime, you can go with a protective style.
Sew-In FAQs
You should wash your weave approximately as often as you’d wash your natural hair. For some people this is daily, while others can go up to two weeks.
You can use regular shampoo to wash your sew-in. However, you should consider any special treatments your sew-in might need. For example, if your stylist dyed your weave, then you should use color-safe products to care for it.
Maintaining a weave is similar to maintaining your natural hair. However, there are some things to keep in mind to make your weave last longer:
● You must make sure the braids under your weave dry completely after a wash.
● Be gentle and try not to tug on your sew-in.
● Sleep with a silk pillowcase or bonnet to reduce breakage.
Washing a weave might loosen it slightly if you’re not careful, but it’s uncommon. Most times, a weave loosens due to hair growth. It’s much more important to properly wash and dry your weave than to forgo these steps in hopes that your weave will last longer.
You should brush your weave as necessary when it gets tangled. This will depend on the sew-in hair texture and your styling habits.
To be as gentle as possible, detangle your sew-in starting from the ends of your weave and slowly work your way up the hair shaft as you detangle. You might also want to hold your head at the root of your hair to avoid tugging on the braids underneath your sew-in.
Yes, it’s important to wash your sew-in bundles before they’re installed in your hair. Just like any other manufactured product, there could be residue from any stage of production. Washing your bundles before you install them ensures that you remove any residue and makes styling your new weave easier.
You can wash a weave with a net the same way as any other type of weave, but with two adjustments to make the process easier:
● Use an applicator bottle to apply any product that needs to get to your braids. This is most important for shampoo, conditioner, and scalp oil.
● Dilute your hair products with water. Thinner products will penetrate the net easier, though you may need to use a bit more product to properly clean your weave.
Washing a sew-in can seem like a daunting process, but it’s not all that different from a regular wash day. The most important things to remember are that you’re washing your scalp and natural hair, rinsing out all the shampoo and conditioner, and drying your natural hair and weave completely. When you’re ready to see how a sew-in can level up your hair game, book an appointment with a stylist to get started.


Related articles